These are the cutest flowers ever and you'll love how simple they are. A great way to use up those scraps we always have so many left over.
And if you still need more flower making ideas then go to my Pinterest board called "Crafting Flowers" for lots more tutorials: www.pinterest.com/coleenfranks
Wednesday, October 31, 2012
Thursday, October 25, 2012
"Birds of a Feather" Mixed-Media Tutorial
 |
| On Facebook someone asked me how I did these. She liked seeing through the image to the text or music below. It really is not difficult so I shall summarize enough that you could repeat it. This one has a Russian music sheet. And you'll need napkin images of your choice. As you can see I like birds and these were from my napkin collection. |
 |
| I started with a card stock base to give a bit more strength, though I have done these on heavy paper as well. You could also gesso your paper to add strength, but I don't often do that. Some of it I stamped before I did anything around the edges and some stamping I did after adhering my text and images. It really is your choice. This one has a Russian language phone book page in the background. |
 |
| After stamping you are ready to adhere your background layer. You can also paint and do other decor around your edges. This background text is a Russian language phone book page again. I like using foreign text. Rather gives an air of mystery. Use Elmer's Glue (PVA) diluted at least 50% or ModPodge. You want it pretty watery. Living in Ukraine where I can't easily buy many materials I mostly use the white glue. It works well and it's cheap. |
 |
| Paint the surface of the cardstock where you will lay your background paper or paint the back of the image. I lay the text down, paint the glue on top of it and immediately take it to my heat gun (hair dryer also works) to dry as fast as I can to prevent too much buckling in the lower card stock. When that is dry I repeat the process for the napkin (all layers removed except top image). I do not paint the back of the napkin. Only the surface upon which I will lay it. It is too delicate. Once down I paint on top of it, but here you must be very careful not to overwork it as napkin fibers break down quickly and it could start tearing so watch closely as you work. Then go immediately again to the heat gun and dry. When you are all done you can press it in a book to help flatten, but I usually don't mind a bit of buckling as I think that adds to the character of the piece. I also do these in my art journal. See previous post of Oct. 11 or go here http://vintageterrace2.blogspot.com/2012/10/projects-using-tissuenapkins-for.html. In addition, the post just below shows a suitcase I altered using napkins. Give it a whirl. These are fun and there are so many beautiful napkin images. |
Monday, October 22, 2012
ALTERED ART
 |
| I just love old things and this leather suitcase was in our attic for years. Someone gave it to us almost 20 years ago when we came to the mission field to pack our things in. Sometimes I just wish there would be a history we could hear. I just wonder the places this old suitcase has traveled before it even got to us. I wonder if the first owners are even still living and how interesting it would be for them to see what's happened to it. Along with my love of old things and history, a number of these pictures are relatives of friends of mine.. The flowers and colors are from napkins. Yet to be done is the other side. Hope you like it. Let me know what you think. |

Wednesday, October 17, 2012
Sunday, October 14, 2012
Z SCRAPBOOK AND SPRAY INK TECHNIQUE
A very cool little scrapbook and a fun and simple ink technique by Diane Marra of AdoreHimCreations. You can find her here: http://dianemarra.typepad.com/adore_him/
Thursday, October 11, 2012
PROJECTS USING TISSUE/NAPKINS FOR CRAFTING

 |
| All these projects were done with the layering technique I posted about yesterday. This is a mini-book. Left page says: "Therefore if the Son makes you free you shall be free indeed." John 8:36 |
 |
| This and the following cards are "Fat Book" pages I did for a swap. I just like birds. |

 |
| A post card that was mailed off and never made destination. I guess someone along the way wanted it for their collection. |
 |
| This and the following are again "Fat Book" pages made for a swap. |


Wednesday, October 10, 2012
USING NAPKINS/TISSUE IN PAPER MAKING
 |
| I am including here a link to an earlier posting in 2010 that gives instructions how to make this "fabric paper." It's not my original idea, but I can't tell you where I saw it. |
 |
| I started with fabric on bottom layer (you can see it, white with black petal pattern), then a layer of scrap papers. For this I used various old Christmas and other gift wrap. |
 |
| The final top layer can be tissue paper or the white layer of napkins (or colors for that matter). The final result of either leaves a very textured top layer great for all kinds of crafting. |
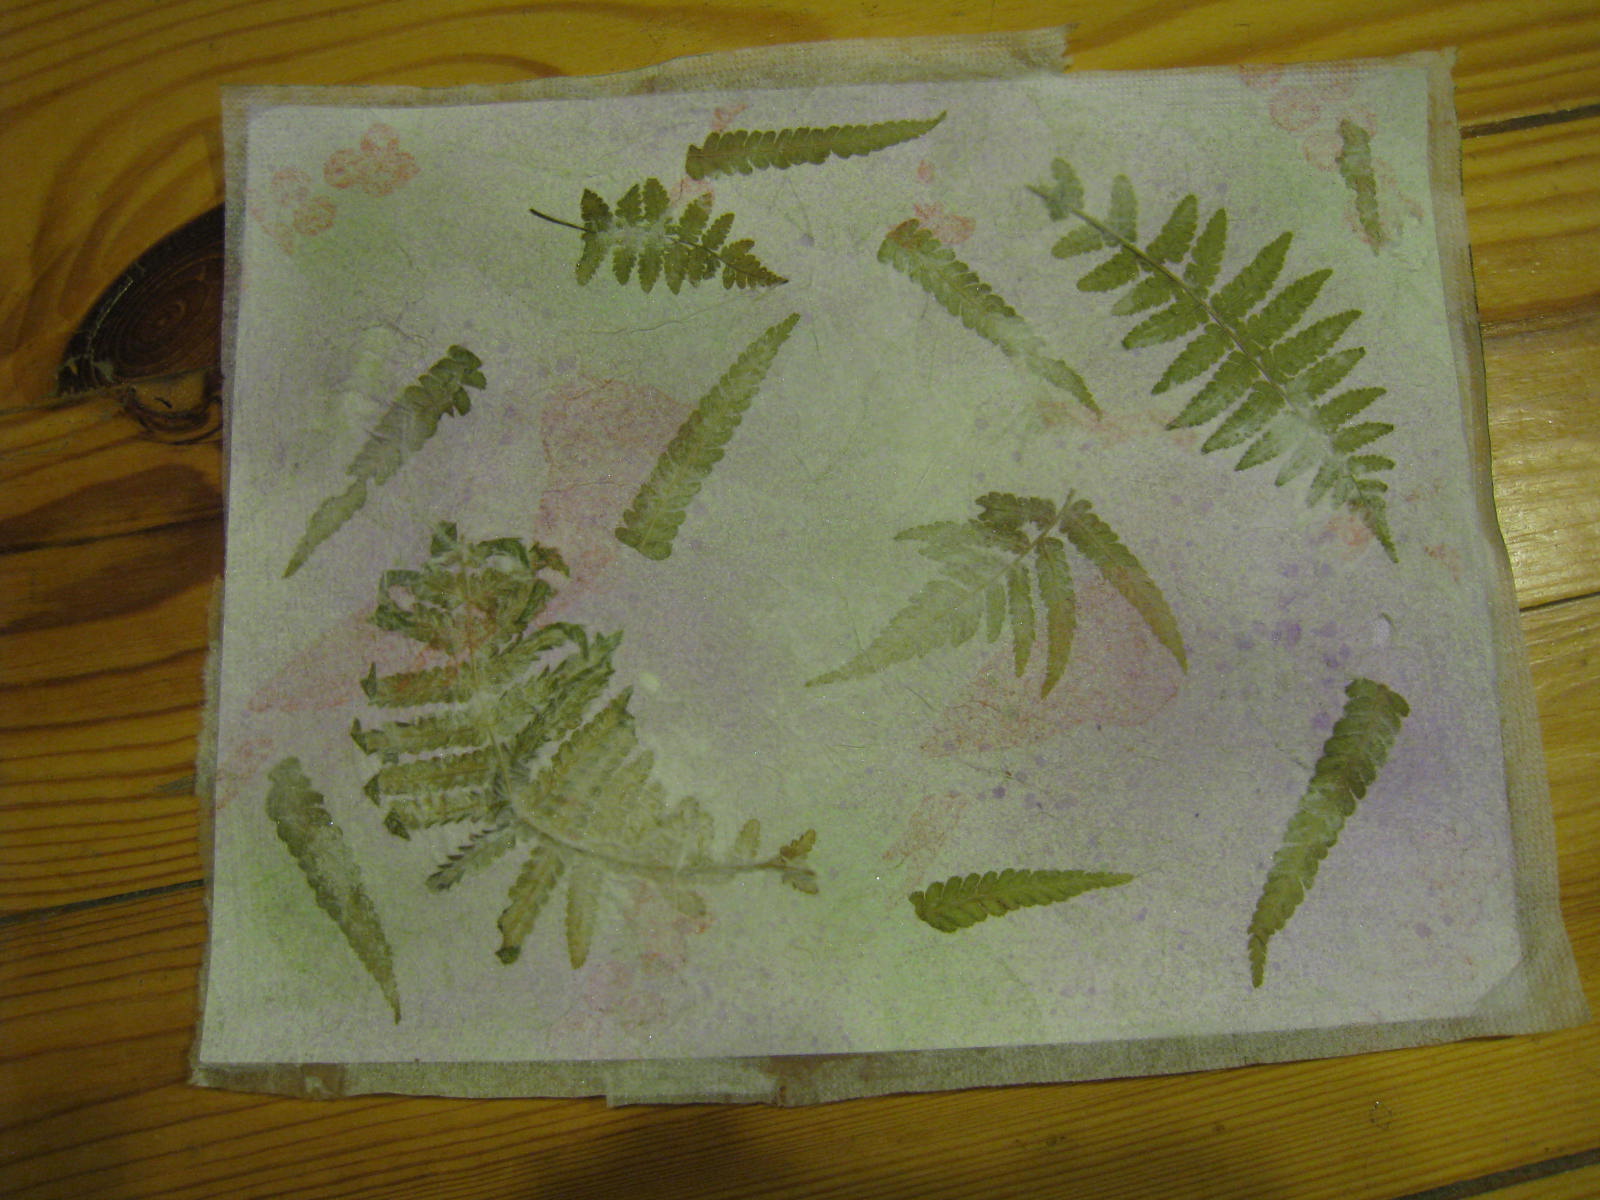 |
| This lovely piece is done with dried ferns from my garden. They worked just as well as the paper with nothing done differently. Tomorrow I'll post a variety of projects I've made with these papers. Thanks for stopping by and I love it when you leave comments. You can find instructions for fabric paper here: http://vintageterrace2.blogspot.com/2010/03/fabric-paper-instructions.html |
Monday, October 8, 2012
USING NAPKINS IN YOUR ART JOURNAL
 |
| Recently I have participated in a napkin swap in two different Yahoo sites: Christian Paper Artists and Altered Books. So I thought I'd show some of the things I've done with napkins. Though I have used napkins for years in various projects, this is one of the first journal pages I did a few years ago surrounding faces I'd drawn. It was rather an experiment, but I was happy how it turned out. The grapes and leaves are napkins. |
 |
| I was so happy when I found these bird napkins in Kiev, Ukraine. The birds and the leaves are the napkins. I also used music sheets from paper applied with thinned white glue like the napkins. Left page is written, "It is in all of us- to express, to create, to seek approval and fellowship of others." On right page, "It is in all of us to be brave, to seek adventure, to want an amazing love, And to never forget---we are on this earth to love one another." |
 |
| The pumpkin and the basket are napkins along with the top leaf border and right border. The bottom leaves are simply paper cut-outs. The right page says, "A Sweet Friendship Refreshes the Soul." Proverbs 27:9 This page was done as a monthly verse challenge on Yahoo's Christian Paper Artists site. |
 | |||
| This last art journal example is using the inside (the non-printed) part of the napkin. I liked this picture but I didn't want it to so dominate the layout so I toned it down by covering it with the napkin. Left page says, "Help me to unearth the passions of my heart that lay buried in my youth." Ken Gire. The right side, along the opening lily says, "And the day came when the risk to remain tight in a bud was more painful than the risk it took to blossom." Anais Nin. Tomorrow I shall post "altered art" pieces done with napkins. Thanks for stopping by. I so appreciate your comments. |
Saturday, October 6, 2012
"ALTERED ART" ANYBODY?
 |
| I love taking ordinary items and turning them into something beautiful. It just fits with good stewardship of our world in recycling things whenever we can. No, I didn't make this clock or the things below, but wanted to share their beauty. |
 |
| I chose these pictures from things I have found across the internet and posted to my Pinterest board. Don't know what that is? Well, I didn't either at first. It is a "virtual bulletin board." One can collect the things you love and pin them to whatever category boards you set up. |
 |
| So, if you'd like to see my boards and find out more, or if you'd like to explore more on these individual artists go to this link: www.pinterest.com/coleenfranks |
 |
| The specific board for these items are listed under "Altering Books and other things." |
 |
| Lots more altered art there to see and explore. |
 |
| I have an old globe. My wheels are turning. |
 | |
| I wonder if my sister would notice is I stole this out from under her wig? |

 |
| Love this. Wonder if one of my musical friends can find me an old defunct violin. Which one of these projects is your favorite? |
Monday, October 1, 2012
FALL ART JOURNAL PAGE ~ FRIENDS
 |
| HAPPY FALL TO ALL! I used napkins to create this journal page. The page on the right says "A sweet friendship refreshes the soul." Proverbs 27:9. This was a challenge for September for Christian Paper Artists on Yahoo Groups. I used text and music sheets for the background, then covered with some paints before applying the napkins. The top and right boarder leaves, the pumpkin and the basket are all napkins. The green leaves on the bottom are paper cut-outs. There's some stamping and the word "Friends" was done with a stencil and some wall paste. |
Sunday School Crafts ~ Ukraine
 |
| This is our Sunday school director Helen leading her class of 4 and 5 year olds in a flannel graph lesson. We had already done their crafts which are laying on the table and seen below. |


 |
| This is a picture of Liza with the 6 and 7 year old class doing the same project as above. Liza is great with the kids and very creative herself. |
Subscribe to:
Posts (Atom)
 Made with My Cool Signs.Net Made with My Cool Signs.Net
|